If you are looking for a guide on how to publish a game in Roblox, you’ve come to the right place!
Making a game in Roblox is easy, and publishing the game for anyone to play is even easier!
This in-depth guide will walk you through exactly how to publish a game on Roblox. Whether you’re brand new to game creation or have used Roblox before, you’re sure to find something useful to help you make full use of this robust game development platform.
What is roblox?
When it launched in 2006, Roblox was just another newcomer to the world of game development. Now, more than 16 years later, this gaming platform attracts more than 164 million monthly users around the world.
Whether you’re a novice or an advanced game designer, Roblox has the tools to help you create virtually any game in a short amount of time.
With so many different game lovers making Roblox their primary development and play platform, the engine has grown into more of a community than just a design tool. You can play and create games alongside a diverse array of individuals from every corner of the globe.
Guide on how to publish a game on roblox
Before knowing how to publish a game in Roblox, we have to know first how do you make a Roblox game?
First, let’s learn some basic Roblox terms.
What are Roblox Games?
Not only can you develop games on Roblox, but users can also play video games right from the Roblox app for computers and mobile devices.
There are now more than 40 million games available on the platform.
Whether you’re into puzzles, role-playing, strategy, sports, or other genres, the possibilities with Roblox are endless! Some of the most popular games on the platform (that you may have heard of) include Adopt Me, Brookhaven, Tower of Hell, and MeepCity.
Roblox Studio: The game builder
Roblox has a robust world building tool of its own called Roblox Studio. From building terrain and designing characters to coding, texturing, testing, and even publishing, this app allows you to do virtually all your game development in one convenient place.
Start by downloading Roblox Studio here.
The app is compatible with both Windows and macOS, so you can choose the platform that’s compatible with your preferred device.
Once you’ve successfully downloaded and installed Roblox Studio, let’s open it!
If you don’t have a Roblox account, you’ll need to register one to use Roblox Studio. Just click the Sign Up button right in the app, and start your registration process. Once registered, use your username and password to log into Roblox Studio.
The world of Roblox awaits!
Before you dive in and start creating Roblox games, it helps to know a few basic details about Roblox Studio. For more advanced game development or unique game mechanics, knowledge of Lua is necessary.
how to make a game on roblox
Like other game engines, Roblox Studio welcomes you with a starter screen where you can either choose to start a new project or select a pre-defined template.
Templates include preconceived world types and structures that you can use for a quick head start on your game project.
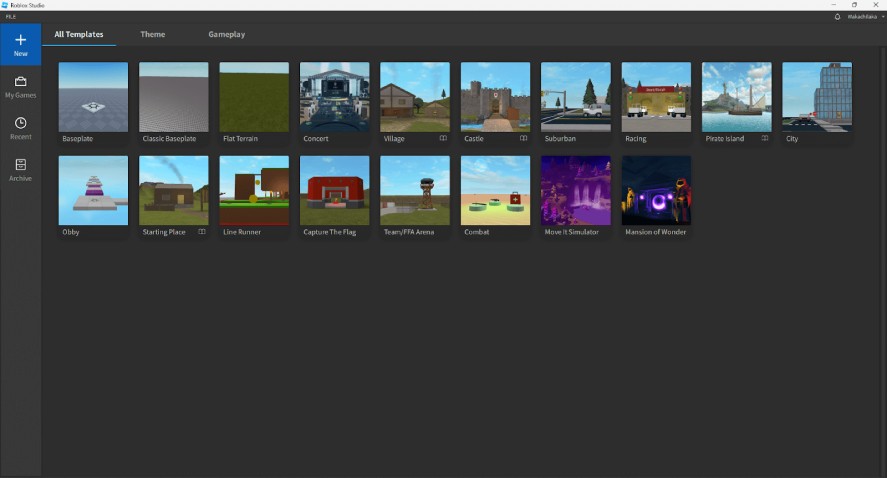
Beginners can select from more built-out templates that already include complex elements.
More advanced Roblox users may prefer the Baseline, Classic Baseline, or Flat Terrain templates as these options are more minimal, allowing you to leverage your design skills to complete your ideal vision for your game.
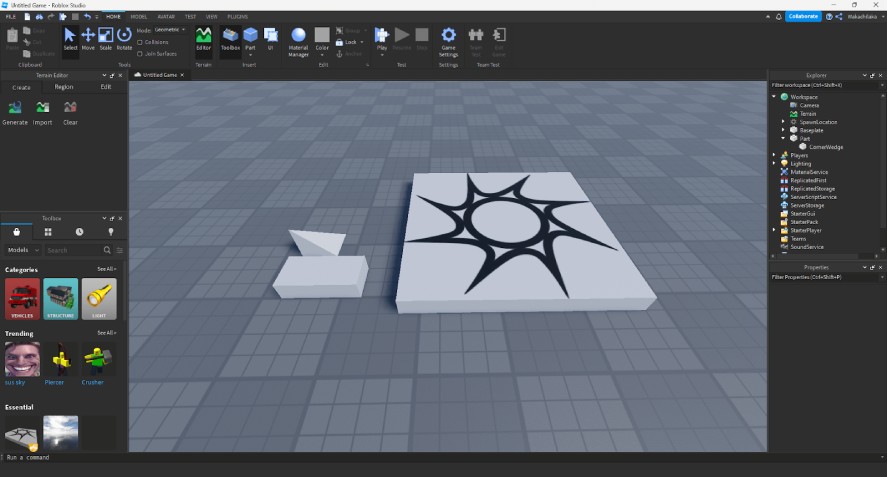
1. Explore Roblox Studio’s Interface
The first thing you’ll notice after creating a new Roblox game is the big viewport in the middle of the screen. This is where you’ll spend most of your time creating characters, developing terrain, adjusting objectives, and building other elements.
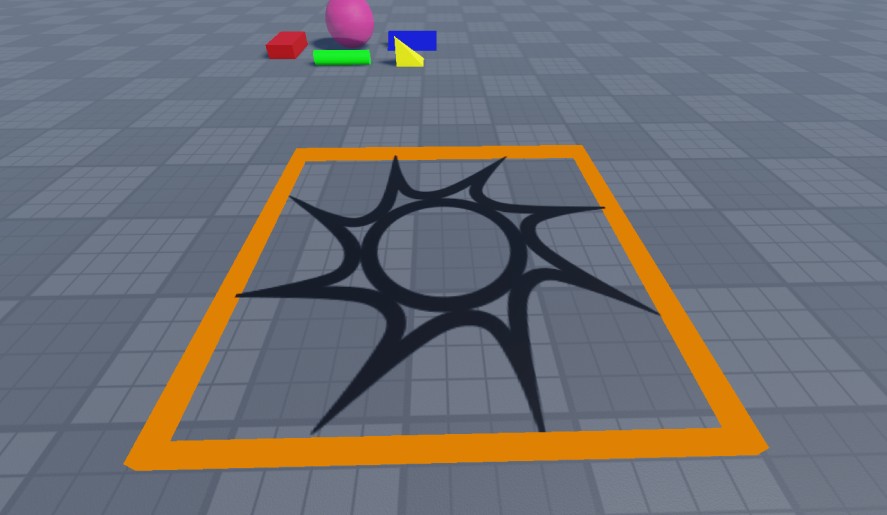
Near the pixelated ground, you’ll notice a white platform with a sun icon on it. That’s the spawn platform where your main characters spawn in the game.
Explorer and Properties
On the right-hand side of the development dashboard, you’ll see two tabs: Explorer and Properties.
The Explorer tab lists all elements of your Roblox game as a hierarchy tree structure, including the camera, terrain, spawn location, players, lighting, server storage, script, sound service, and chat.
With each item chosen in the Explorer tab, different properties will appear below in the Properties tab. You’ll primarily use this menu to change the appearance of an object or how they work.
You can adjust virtually any element you like, including colors, materials, reflectance, transparency, size, position, pivot, collision, and more.
If you don’t see the two tabs mentioned above, click the View menu on the top toolbar, and then select the Explorer or Properties icon. The selected menu should now appear on the right-hand side of Roblox Studio.
Toolbox
On the bottom-left side, you will see a small Toolbox interface that allows you to quickly use any assets made by others and yourself. Whether you’re looking to integrate models, plugins, audio, images, meshes, or videos, you’ll find what you need here.
Need a realistic sky texture? Drag it over to your project!
Looking for a fancy character with a cool hat and a big hammer in his hand? You know where to go!
If you do use assets created by others, just remember to pay respect by leaving the appropriate attribution credits in your game once you go to publish it.
Basic Camera Movement
You can use both the keyboard and mouse to move around and interact with objects in your Roblox world. Here are some shortcuts that’ll save you time and hassle!
- Left-click mouse: Use to choose a specific object. You can also click and drag to select multiple objects at once.
- Middle-click mouse: Drag the entire viewport in the opposite direction of your mouse.
- Right-click mouse: Adjust the view angle in your viewport.
- W/S key: Zoom the camera in/out.
- A/D key: Move the camera left/right respectively.
- Q/E key: Move the camera down/up respectively.
- Shift + movement key above: Move the camera at a slower speed to concisely reach your object. This speed can be configured in the Settings menu.
- F key: Instantly pan the camera to a chosen object. This is especially useful if you have a large world.
Once you get the hang of it, Roblox Studio becomes even more intuitive and easy to navigate. With enough time, you’ll learn the ins and outs to be able to speedrun creating a custom game in an hour or less!
2. Parts
Parts are the most common objects in Roblox Studio. You can use parts to construct terrain, buildings, platforms, and entities. Anything your player can physically see and interact within the game is a part!

To create a new part in Roblox Studio, right-click in the main viewport and select “Insert Part” Alternatively, you can also locate the Home menu on the toolbar and click the Part icon or simply add parts from the Explorer tab.
Currently, five different parts are available:
- Block
- Sphere
- Wedge
- Corner Wedge
- Cylinder
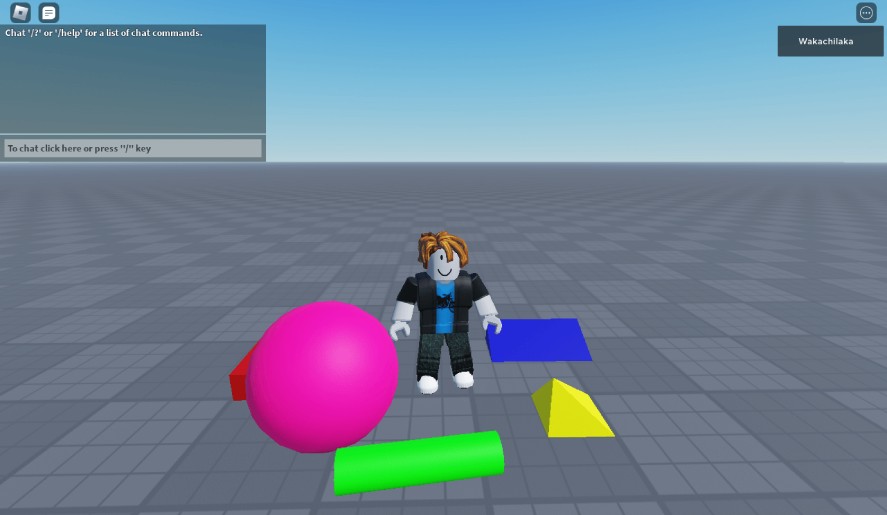
Parts are essentially building blocks that fit together to create anything you can imagine. If you’re new to Roblox, try playing around with them to see what you can make. If you’ve used 3D modeling apps such as Blender or Maya, this process should be very familiar.
A part can independently stand on its own, or it can be connected to other parts to create a whole complete structure. Instead of having a fixed position on the map, parts can also have relative positions depending on the location of other parts.
Parts can be easily moved around or amended to change their size or colors. They can also be rotated to fit your map accordingly. To equally modify the object, hold the Control (Windows) or Command (Mac) key while you drag the size axes.
If you want to duplicate a part, select it and press Control + D. To delete a part, select it and press Delete or Backspace. To revert a deletion, press Control + Z.
3. Properties
For each part you’ve created, you can configure a number of different elements, including the name, color, material, reflectance, and transparency. This allows you to completely customize objects in your world in just a few simple steps.

Two additional Roblox Studio tools that you’ll find super useful are Anchored and CanCollide.
If you want a part to be affected by gravity, uncheck the Anchored checkbox. Otherwise, it will appear to be floating in the sky or static in whatever position you set it.
If you enable “CanCollide” on a part, the players will be able to touch it but won’t be able to walk into it. Use this option to create realistic environments in your game.
For example, walls should have CanCollide turned on while grass shouldn’t.
4. Spawning Point
To place more spawn points, go to the Model menu and look for the Spawn icon within the Gameplay tab. You can place multiple spawn points in one Roblox game.
To hide spawn points, set their transparency property to 1, uncheck “Cast Shadow,” and delete the decal object inside them. To make it so that characters can walk through your spawn points, remember to uncheck the CanCollide property.
5. Coding/Scripting with Lua
To ensure your game works the way you want it to, scripting is needed.
If you’re not comfortable writing your own code, you can use Roblox Studio’s pre-defined gameplay or take advantage of assets created by other users that include attached scripts in the Toolbox panel.
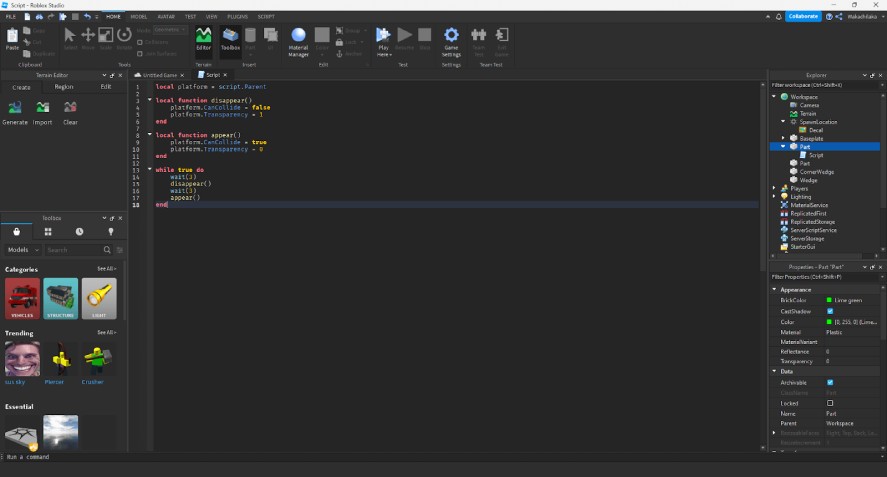
To add custom functionality for parts and models to your Roblox game, simply choose a part in the Explorer panel, and select the plus (+) icon next to it. Then, click “Script” to add a new script to that part.
Once selected, you’ll see your script automatically open as a new tab in your viewport.
Now, you can perform all sorts of magic by making the platforms move around, disappear, or reappear in a time period. You can even build your own upgrade system to make your Roblox game more enjoyable for players.
6. Test Your Roblox Game
Testing is a crucial part of game development. Even if you consider yourself a beginner, you’ll want to ensure your game is at least playable so that others can enjoy the fruits of your labor.
To test your game, click the Play icon in the Home toolbar. Or, you can locate the Test toolbar for more test settings.
After a short amount of time, you can play your game directly inside Roblox Studio’s viewport. Once you verify that all the functions are working perfectly, click “Stop”.
Before finally publishing your game on Roblox, you’ll want to save your game as a backup on your local computer. To do so, click “File,” and select “Save to File” or “Save to File as”.
Then, choose the location you want to save and enter a short name for your backup file. This ensures you have a backup copy just in case something happens to the file within Roblox Studio.
Once you’re confident that your Roblox game is finished and ready for the world to see, it’s time to publish it!
How to Publish a Game on Roblox
Congratulations! You’ve learned the ins and out of Roblox Studio and have created a playable game of your own.
Now’s the time to let others find joy in what you’ve created. Here’s a step-by-step guide on how to publish a game on Roblox:
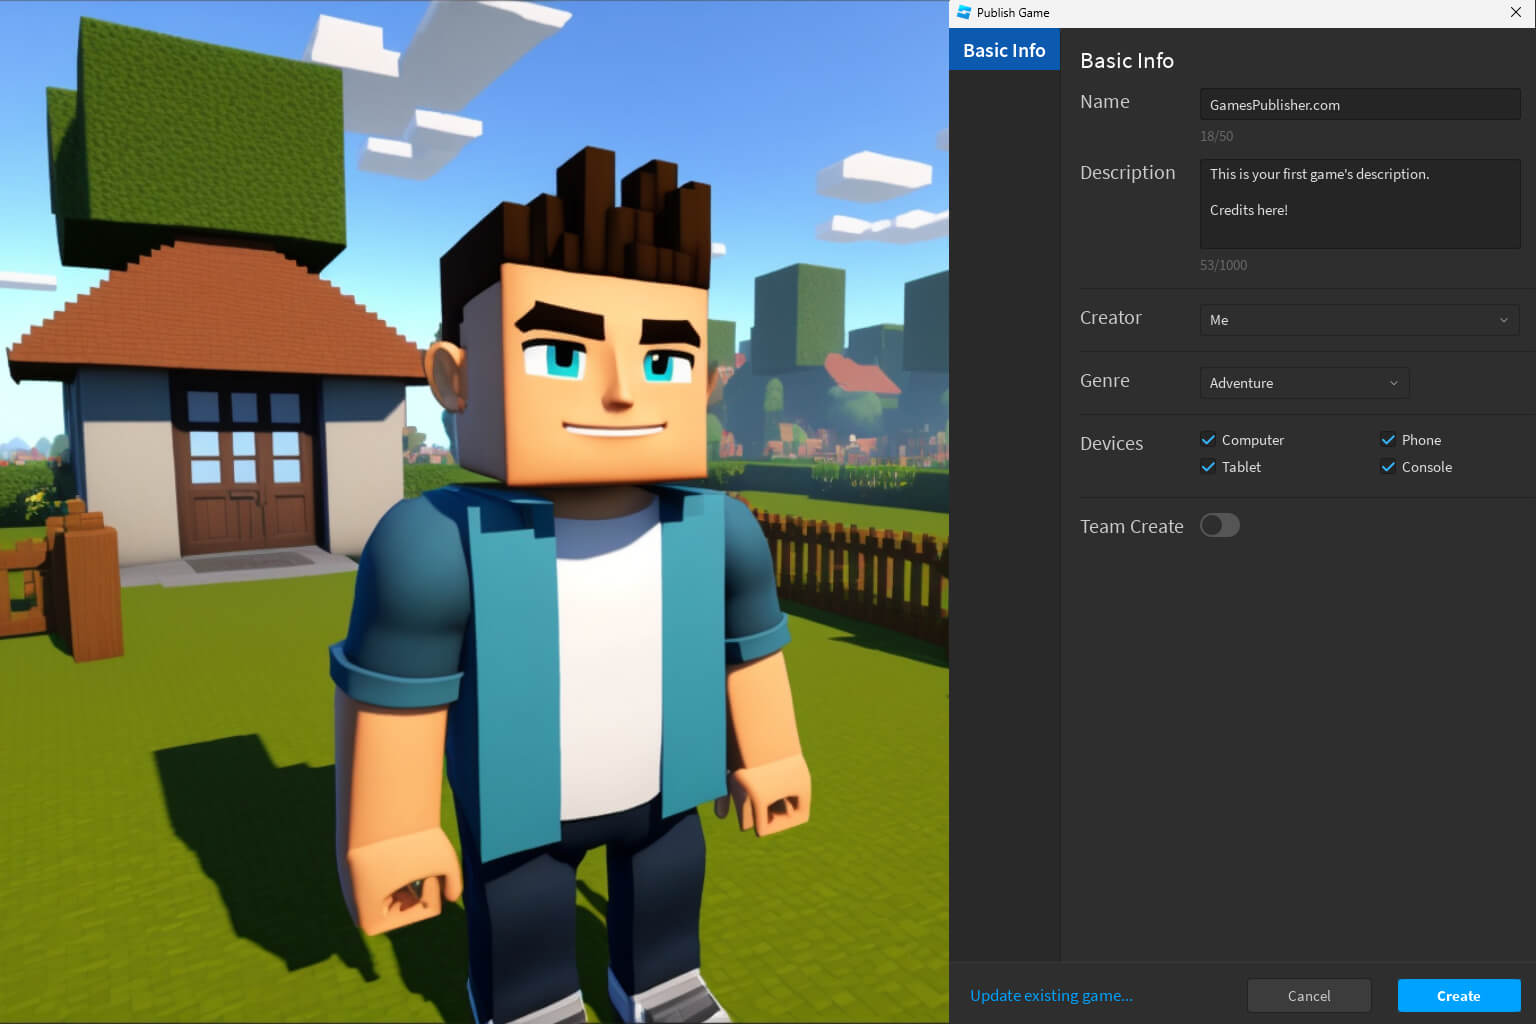
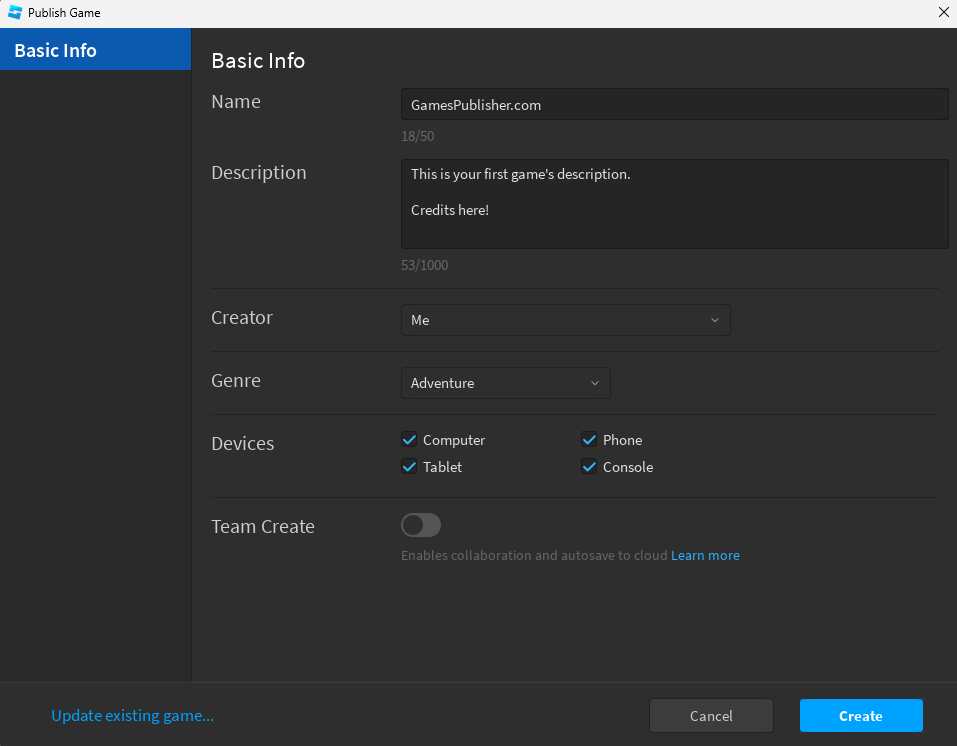
- In Roblox Studio, click “File”, and then select “Publish to Roblox”. You can also press Alt + P for a quick shortcut.
- A pop-up will appear. Give your Roblox game a short but memorable name. This is what players will see and search for in the Roblox library.
- Make sure to fill in the description. Describe your game and what’s included so people know what gameplay and features to expect. Also, if you use others’ work in your game, this is the perfect place to give them credit.
- Keep “Me” selected in the Creator dropdown since you’re the one who created the game!
- For the Genre dropdown, choose the genre that fits your game the best. Selecting the right genre will help users more easily find your game with filters.
- Your game will be published and available for PC, mobile, and tablet by default. You’ll want to make your game run on all supported devices by checking the Console checkbox. (For now, PlayStation and Switch aren’t options.)
- Click “Create”
- Your Roblox game is now published but still in private mode. To make it public and available to anyone to play, go to File, then the Game Settings menu, and click the Permissions tab. Here, you can choose either “Friends” or “Public” so that others can play your game.
Remember, you can always publish your game first and set public permissions later. These settings are also available on the welcome screen of Roblox Studio.
Conclusion
And that’s how to publish a game on Roblox!
Beyond what was covered in this post, Roblox offers a host of other tools to customize your game further and develop something unique for players around the world. With enough time spent in Roblox Studio, you’ll learn to take advantage of everything this robust platform has to offer.
Loading survey...